How to Install SQL Server 2014
This installation guide will teach you the basics required for a typical, problem-free installation of SQL Server 2014, allowing you to add other components later if you wish.
Remember to install the .Net Framework 3.5
Once this Framework is installed you can commence the installation of SQL Server 2014.
System requirements
Supported operating systems: Windows 7, Windows Server 2008, Windows 11,10,8.1,8,
There are multiple editions of SQL Server 2014 (Enterprise Edition, Enterprise Core Edition, Business Intelligence Edition, Standard Edition, Web Edition, Express and Developer Edition). SQL Server 2014 has a free edition – Express but the SQL Server 2014 Management Studio is the same and can be used with each of these.
The entire SQL Server Express edition can be downloaded, however, for downloading only SQL Server 2014 Management Studio, clicking the Download button will present a list of all files the complete installation is contained of, but you’ll need only one of these:
When downloading, Select SQLEXPR_x64 to download Microsoft SQL Server 2014 Express for 64-bit operating systems. For 32-bit operating systems, download SQLEXPR_x86.
Click Next (the button will not be clickable if you have not selected any file).
You will be redirected to a download page where the download should automatically start.
Installing SQL Server Express 2014
Double click or right-click on the .Setup.exe file that you have downloaded from the website and select Run as administrator.
Click Yes if the User Account Control window appears.
Type or browse the directory location to extract the installation files.
Click OK for the files will be copied to the selected folder.

SQL Server Installation center
When the extraction is done, the SQL Server Installation Center window is displayed.
For installing SQL Server Management Studio alone, select the New SQL Server stand-alone installation or add features to an existing installation option (as in the screen shots above).
Once the installation wizard starts the SQL Server Installation Center can be closed.

It’ll take a couple of seconds for the setup rules to be checked (pre-requisites on the operating system). If all the requirements are meet, the SQL Server 2014 setup will start with the License Terms tab as a first step:
License Terms
To proceed with the installation, read the license terms and then check the I accept the license terms checkbox. The CEIP (Customer Experience Improvement Program) checkbox is optional, but if it’s checked, the program will be able to collect information about the computer hardware and how the product is being used (without interrupting users); the next releases of SQL Server are upgraded based on this information.
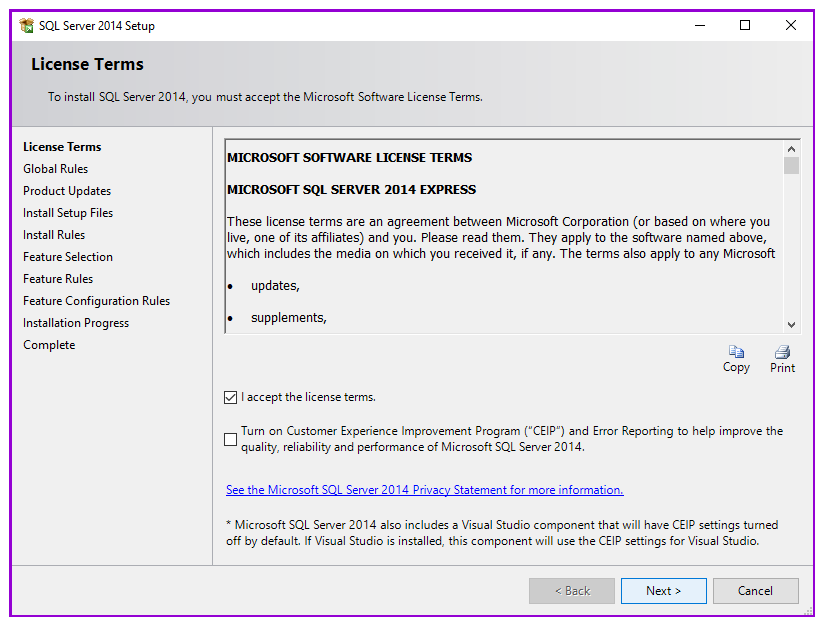
After checking the I accept the license terms, click the Next button to proceed.
Global Rules.
Setup Global Rules identify problems that might occur when installing SQL Server 2014. Which rules are those in some extent depends on which operating system you are installing to but usually include the following:
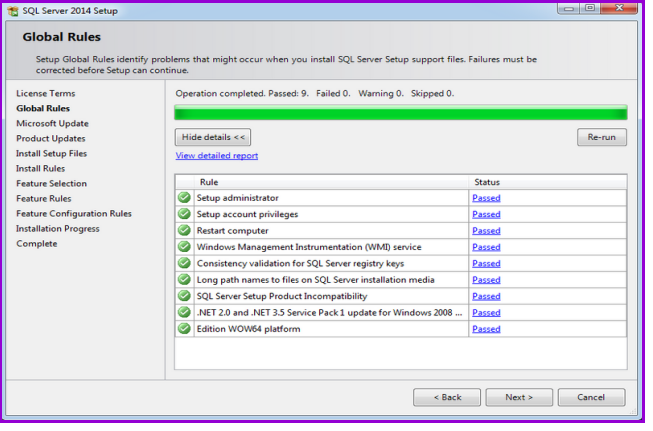
If all the rules are passed, the Global Rules step will be processed and skipped automatically. If some rules don’t pass, you must correct these in order for setup to be able to continue:
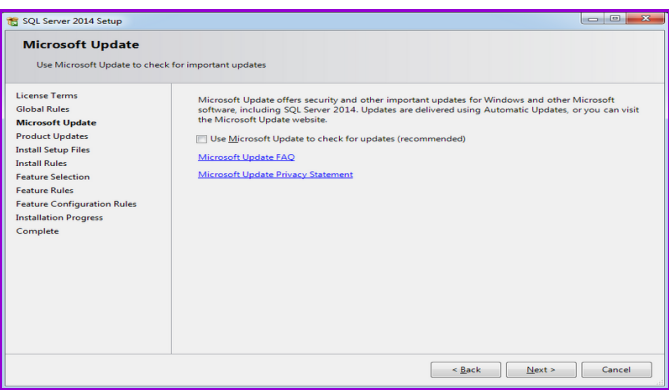
Microsoft and Product Update:
Microsoft and Product Update is optional and whether you select it or not, the installation will be able to proceed after clicking the Next button.
Once checked this option gives the opportunity to download the update and incorporate it with the installation. This action will take some time, as those updates need to be downloaded as well. If you proceeded without checking for updates or it is checked, but there aren’t any updates available, the Product Updates step will be skipped:
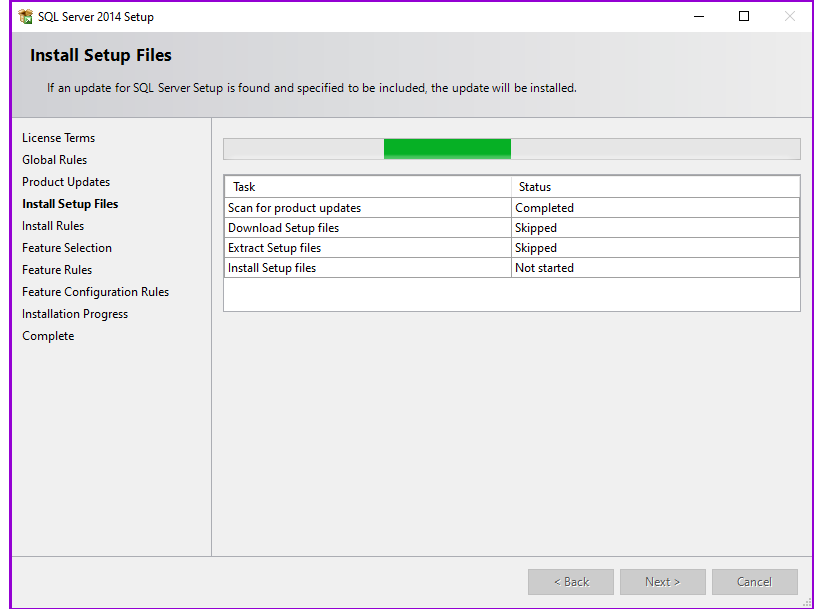
Install Setup Files
Install Setup Files and Install Rules steps are automatically processed.
Install Rules:
Install Rules is yet another step where the setup wizard is checking if certain software requirements are met:
Every rule in the list has a status (whether it’s passed or failed); clicking those links provides additional information if something went wrong.
If some of these rules don’t pass, they must be corrected in order that setup can be continued:

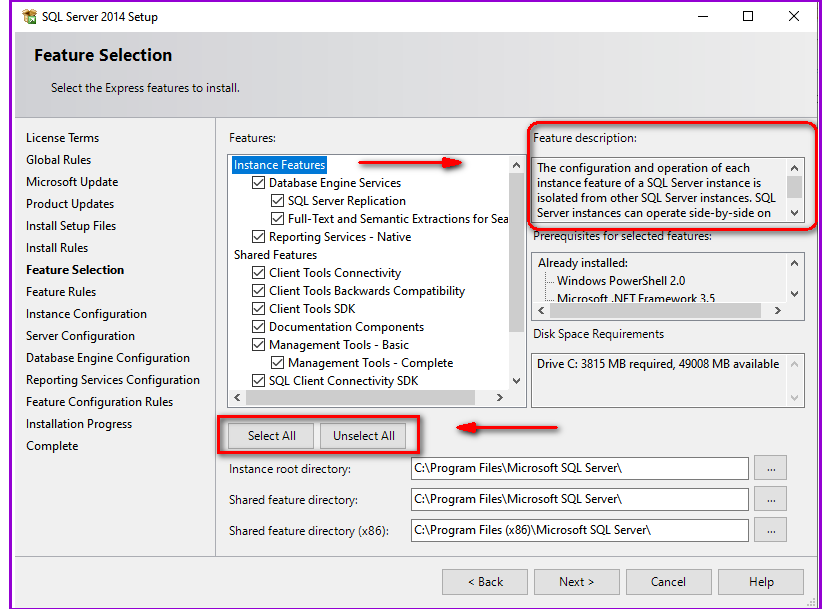
Feature Selection:
In Feature Selection step the only options that needs to be checked in order to install SQL Server Management Studio is Management tools – basic and sub item: Management tools – Complete, however, SQL Client Connectivity SDK will be installed by default, whether you checked it or not.
Each feature has prerequisites which are shown in the Prerequisites for selected features field located right of the Features field , and if some are missing, those will be installed along with SQL Server Management Studio:
In addition, there is a short description for each feature in the Feature description field description field at the top right corner for more details. The description changes when a different feature is selected. See the direction of the Instance Features arrow points.
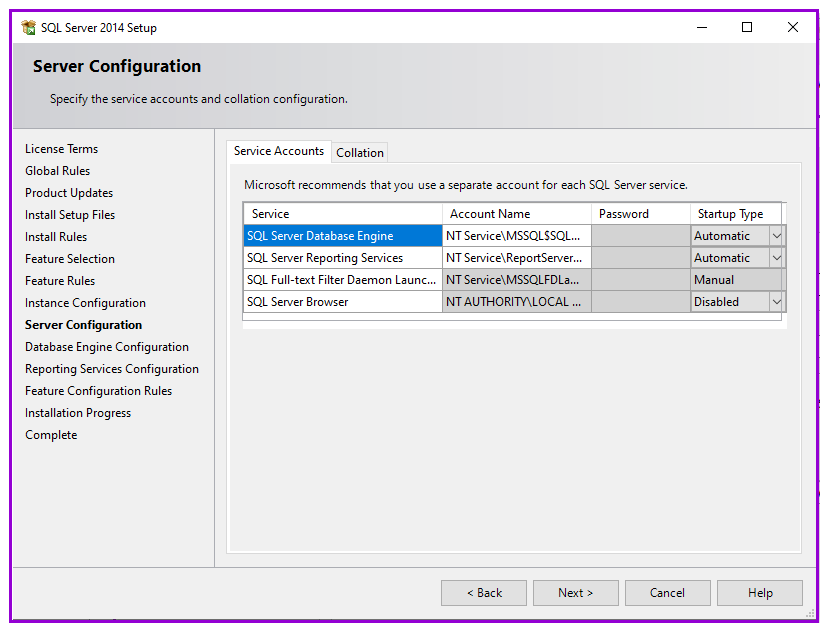
Instance Configuration:

Data Engine Configuration
This screen allows you to set up database engine security.
Change the Authentication Mode to Mixed Mode unless you are certain you only need Windows-only authentication.
If you select Mixed Mode security, you must also provide a password for the SQL System administrator account (sa) account.
Enter and confirm a secure password for the sa account and keep it safe. Do not give it to any one you do not want to have access to the SQL Server.
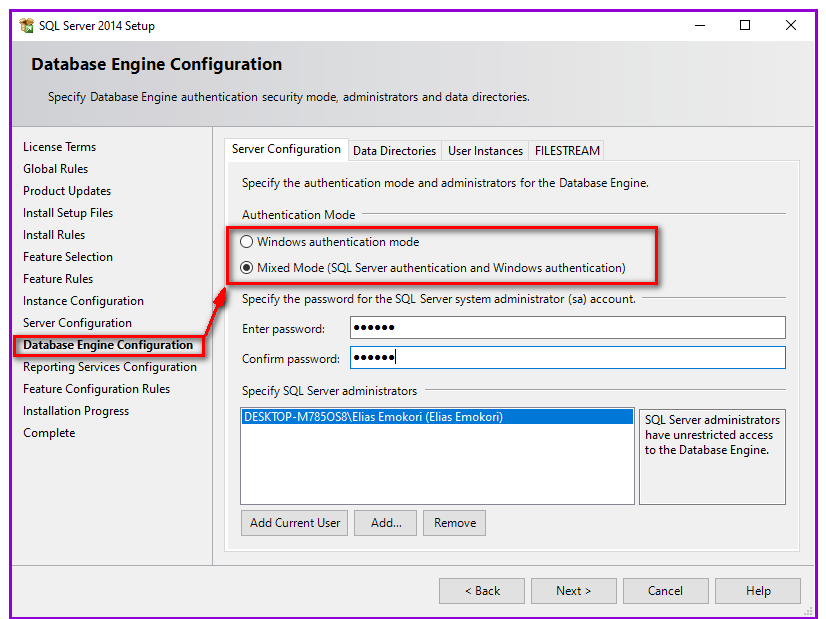
At the point of data engine configuration you can also add or remove other users using the Add or Remove tab including the current in whose credentials SQL is being installed.
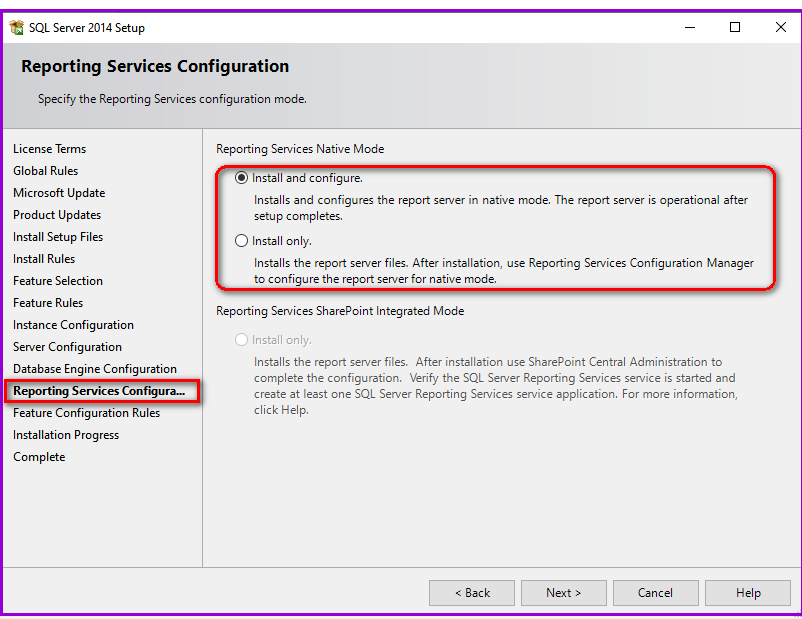
Reporting Services Configuration
The following screen will appear whilst Windows Installer prepares itself for the installation. This will take a short while:
Feature Configuration Rules
When you click on the Next button, Feature Rules and Feature Configuration Rules steps will be processed automatically if all the Feature Rules are met:
When all the rules are passed and the Feature Rules and the Feature Configuration Rules steps are processed automatically, the installation process will start in Installation Progress step.
After 30 seconds or so the following dialog appears again:

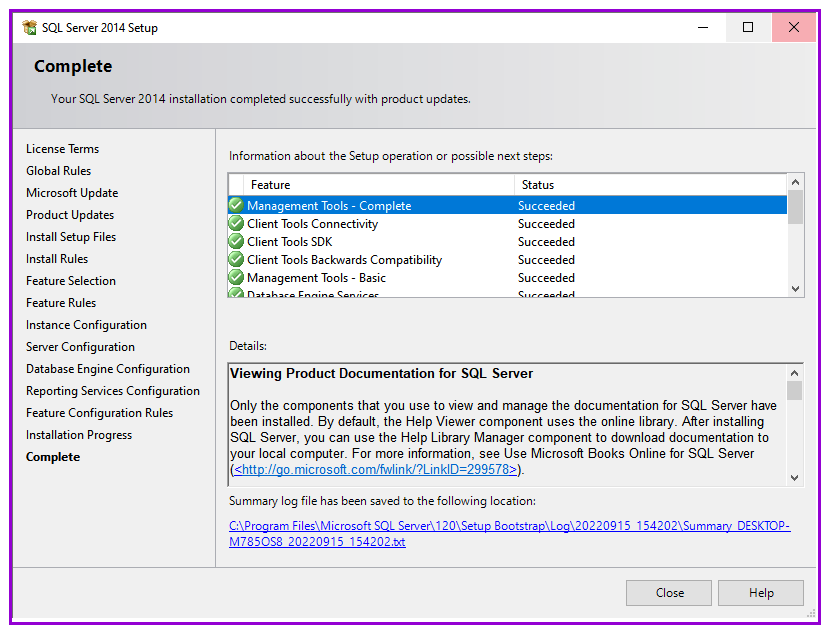
Complete
If all is well, the following screen appears which shows the SQL Server installation was successful:
Check 1: Has the SQL Server Service Started?
To check whether SQL Server 2008 has started, you go to Start -> Right click on the Computers button ->Manage -> Services and Application -> SQL Server Configuration -> SQL Server services.
Check 2: Does Management Studio Work?
Check Management Studio works by firing it up. You go to Start -> All Programs -> Microsoft SQL Server 2014 -> SQL Server Management Studio. The following screen will appear followed by another screen for connectivity:
The following dialog box appears :
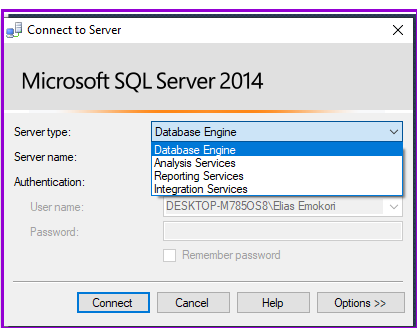
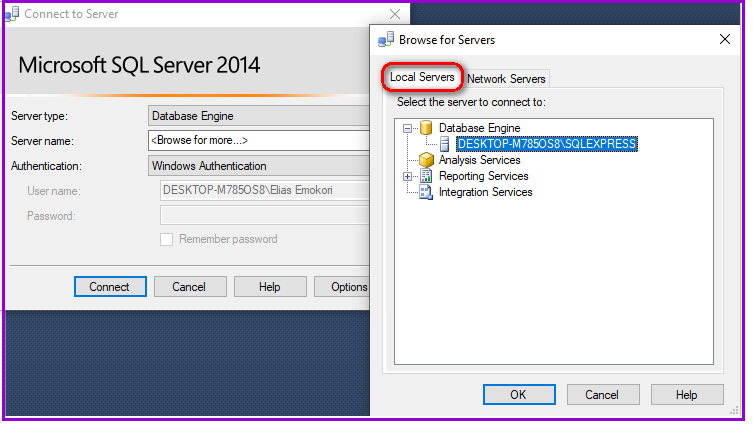
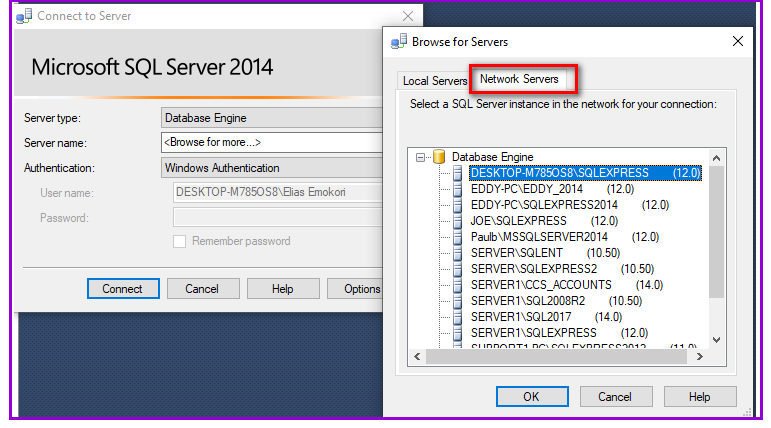
Browsing the data engine, a user should be able to connect to the database through the SQL instances of the local servers installed on your computer or through multiple Network Server instances existing on the network if you have the correct credentials are seen in the screen shots below:
You can run a basic query against the new SQL Server?
Check if the SQL Server works well by running a simple query from Management Studio.
Select New Query and enter the query shown below and then execute or hit F5 / to run it:
"select @@version"

Is SQL Server Agent Running?
Check SQL Server Agent is running for scheduled jobs. You go to Start -> All Programs -> Microsoft SQL Server 2008 -> SQL Server Management Studio. There should be a green arrow next to the SQL Server Agent database symbol (it’s small, you might have to look hard):
Can SQL Server be seen from the Network?
Check that the new SQL Server can be seen from another SQL Server on the same domain by running "osql –L".
If you can’t see the new SQL Server in this list, check that the SQL Server Browser service is started on the machine where you have just installed SQL Server.
Has the TCP/IP network protocol library been enabled on the server?
If the browser service is started but you still cannot connect to the server, click on Start ->Programs -> SQL Server 2014 -> SQL Server Configuration Manager (on the server where SQL Server’s just been installed)
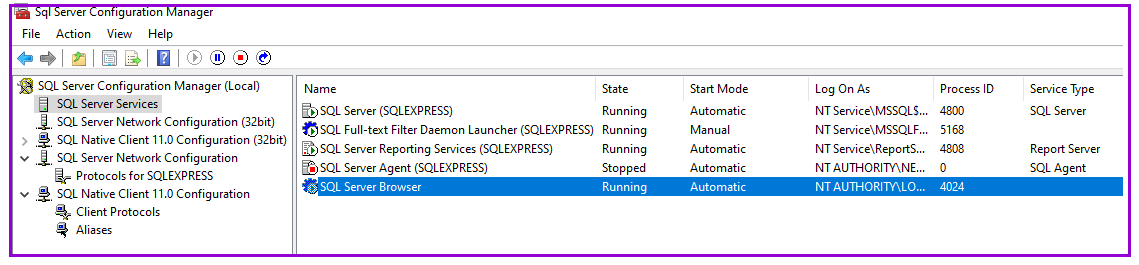
The SQL Server Configuration Manager window opens.
Click on the SQL Server Network Configuration
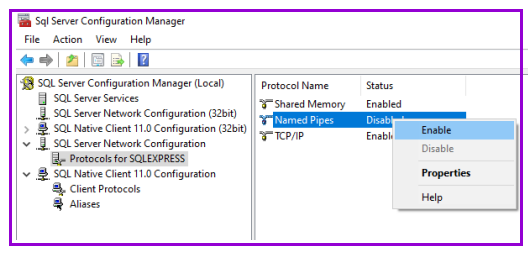
And the Protocols for SQLEXPRESS as installed will show up. Expand it and it will display Shared memory, Named Pipes and the TCP/IP.

In the above screen shot, the TCP/IP network protocol library is disabled. We need to enable it in order that remote servers can talk to the newly installed SQL Server.
• A word of explanation : In most installations, Named Pipes can be ignored, unless there is a requirement for it. In virtually all environments, VIA can also be ignored as this protocol requires a special network card. Shared memory is the “local” protocol that SQL Server uses when talking to a client application on the same server as itself, for example when SQL Server Management Studio connects to it. It is usually best to leave this enabled.
You will need the TCP/IP protocol enabled if you need to connect to your new SQL Server from a remote client or another server via TCP/IP, which is what most networks use.
By default it is DISABLED, double click on the TCP/IP protocol line, and the following window will appear:
Ensure that Shared memory, Named Pipes and the TCP/IP are Enabled. See the images below:

Go back to the Services applet, and re-start the MSSQLSERVER service so that the TCP/IP protocol can be used to connect to your new SQL Server.
Then try to connect to it again from a remote machine.
If you have experienced problems with the previous connectivity tests, you should now be able to repeat at least some of them successfully.
Before you use an SQL database you must ensure that you have done the following:
How to attach an SQL database
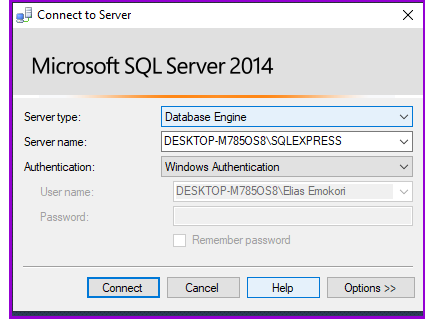
Start the SQL Server Management Studio and the following connection screen is displayed. This allows you to connect to an installed instance of SQL Server on your machine and/or the network.
With Windows Authentication the screen will appear as below:
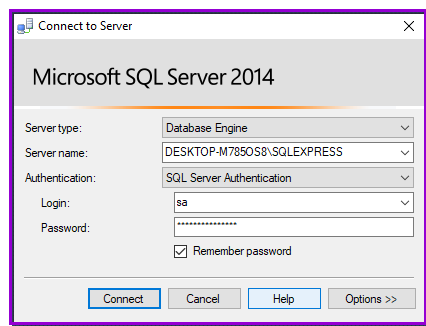
With SQL Server Authentication the screen will appear as below requiring that the user provides the System administrator password:
Click on the Connect command button to connect to the server. When the connection is successful, a screen like the one below is displayed:

To attach a database, right-click the Databases folder and select the Attach option.

The Attach Databases screen is displayed:
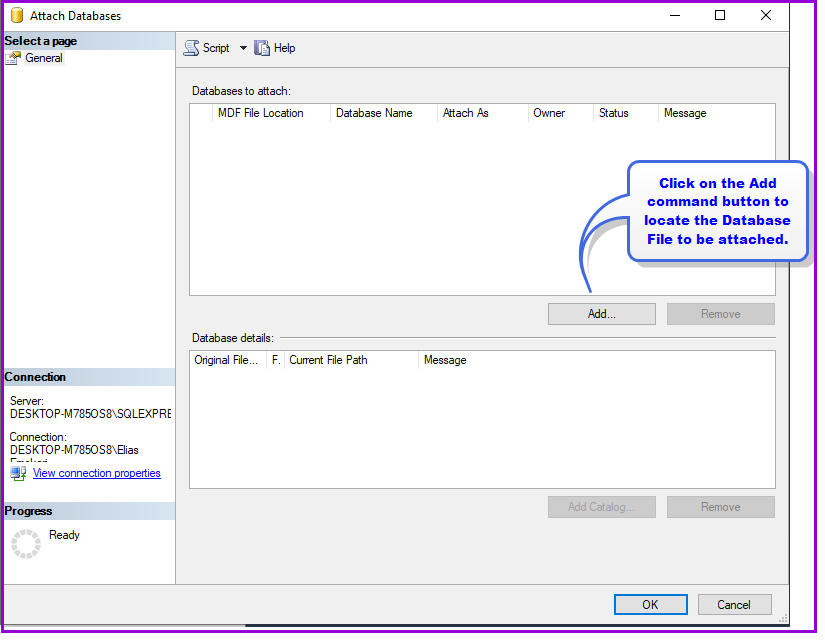
Click on the
Addcommand button. The
Locate Database Filedialogue box is displayed as shown:

Using this screen, select the SQL Server database that you saved on your computer, e.g, "Demodata.MDF". You will need to be aware of where you saved the database file and the name of the .MDF file.
Select the file and Click the Ok button. You will be returned to the Attach Databases screen where the details of the selected database will be displayed.

Click Ok to attach the database.
Once attached, the database will appear on the SQL Server Management Studio screen under the Databases folder as shown.

The database is now attached and will appear on the list of available databases on your Server and ready for use.
You can there after be able to back up or even restore your database as from the same window as seen in the screen shot below:

How to establish the ODBC connectivity
Click on Start, then click on Control Panel. The Control panel window is displayed: Administrative tools position may appear differently according to your computer settings. Click on Administrative tools to locate the ODBC data sources as seen below:
A screen like the one below is displayed:

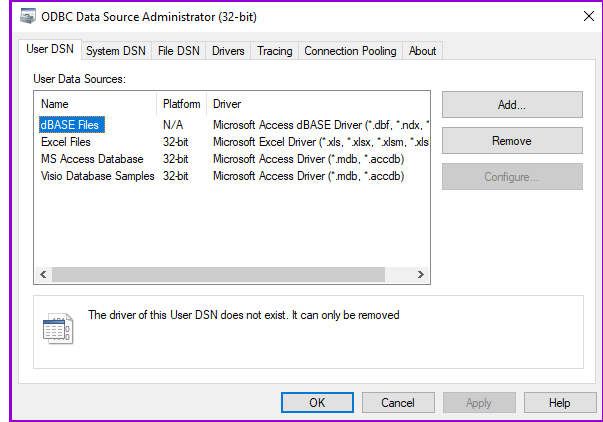
Double click on the Data Sources (ODBC) icon. The ODBC Data Source Administrator window is displayed. See below:
In the ODBC Data Source Administrator Window, select the System DSN tab and click on the Add command button on the right side of the screen to configure.
The Create New Data Source window is displayed. See below:
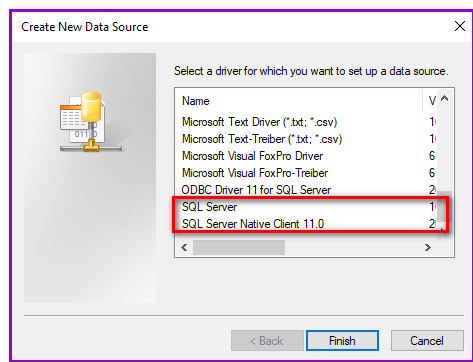
In the Create New Data Source Window, scroll all the way to the bottom of the list and click on SQL Server Native Clients 11.0 or SQL Server.
Click on the Finish command button. The Create a New Data Source Server to SQL Server window is displayed:
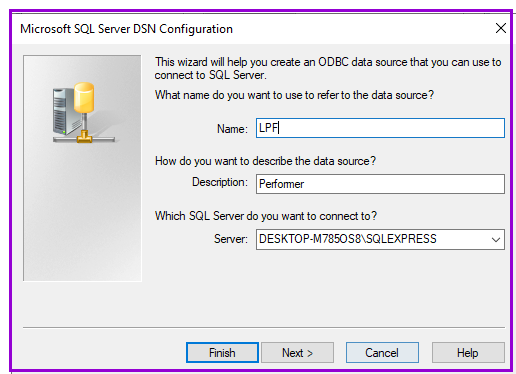
In the Create a New Data Source to SQL Server window, enter a Name for your ODBC connection, e.g., "LPF".
Enter a Description for the data source. This can be any descriptive information that you desire, e.g., "Performer".
From the drop down select the SQL Server instance you will want to connect to e.g "DESKTOP-M785OS8\SQLEXPRESS" on a network there may be different instances.
Once all of the fields are entered, click on the Nextbutton.

Click on the appropriate radio button for your connection type. If you access your SQL Server Database using your standard Windows login, keep the default option, i.e, "With Integrated Windows NT Authentication".
Click on Next command button and the following window is displayed:
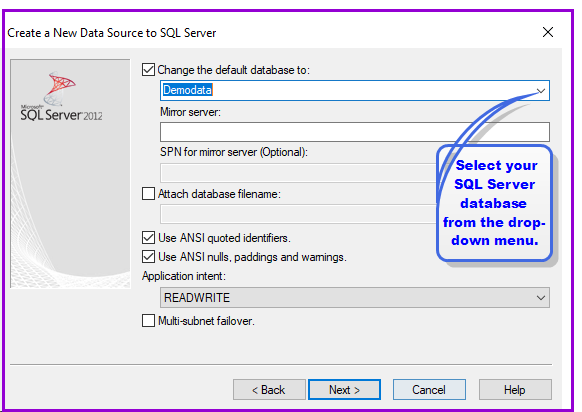
Tick the Change Default Database To: checkbox then, in the drop-down menu, select your SQL Server database name, e.g., "Demodata".
Click on the Next command button and the following window is displayed:
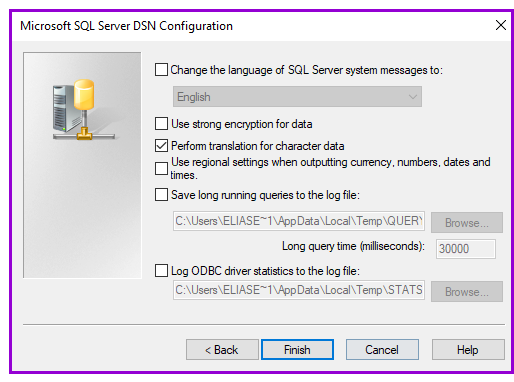
In this window, typically the default options should remain "as is" so do not change any options.
Click on the Finish button. The ODBC Microsoft SQL Server Setup window is displayed:
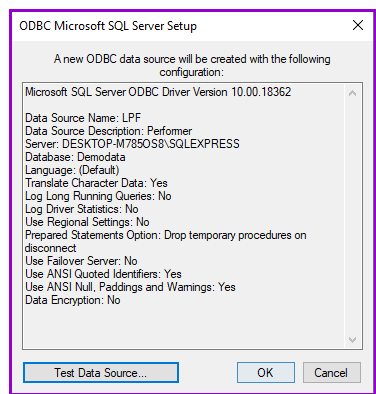
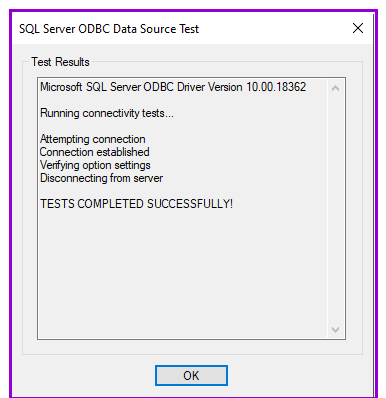
In the ODBC Microsoft SQL Server Setup Window, click on the Test Data Source button to be sure that your connection settings are correct.
Click on the OK command button to exit.
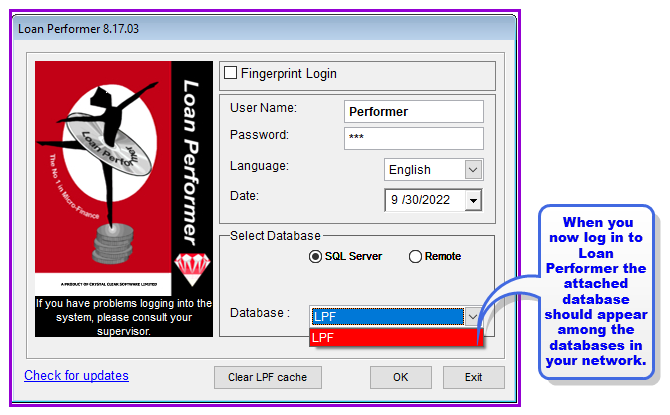
When you now log into Loan Performer (LPF), click on the SQL Server button for LPF to search for databases
existing on your network. The attached database should now appear in the Databases drop down list.
The Nº 1 Software for Microfinance